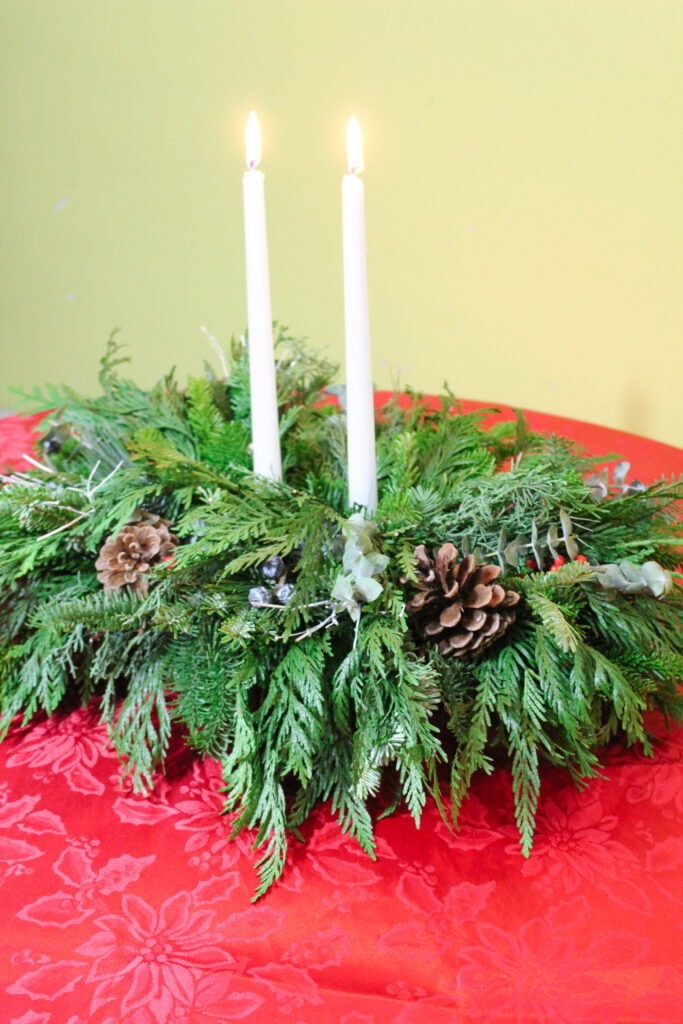
It’s nearly December and it’s time to think about all of those holiday dinners sneaking up. Get your clippers out and liven up your tablescape with a homemade greenery centerpiece! Follow the simple step by step instructions below to create something sure to awe your guests this holiday season.

Supplies needed:
- Floral foam & tray for foam to sit in
- Wire
- 2 tapered candles
- A large bucket or pot
- Clippers
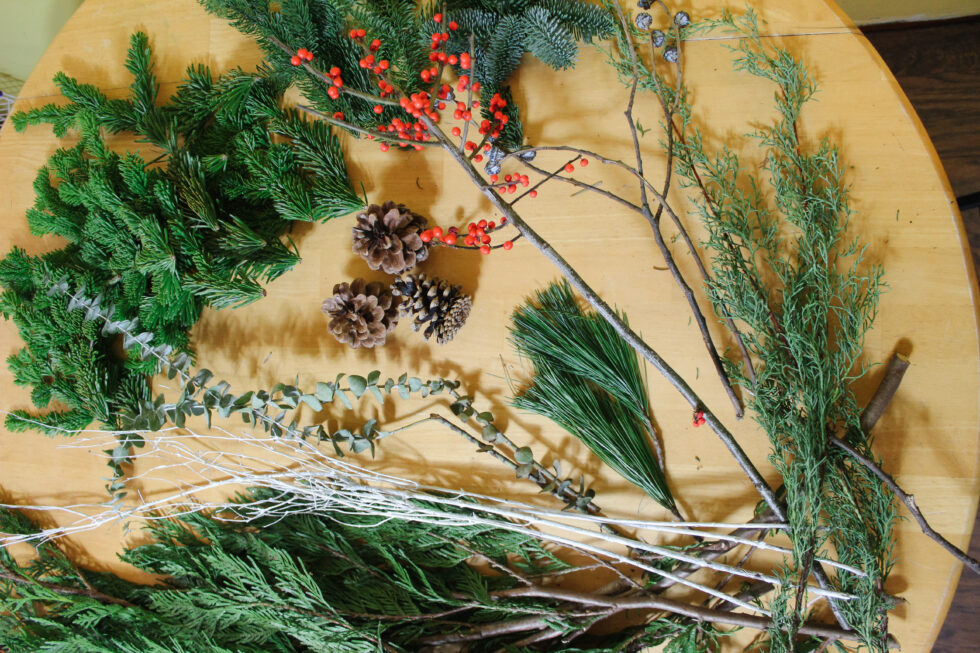
Greenery needed:
- Cedar branches
- Ilex
- Eucalyptus Seed Pods
- Baby Blue Eucalyptus
- Ponderosa Pinecones
- Painted Snowberry Branches
- Fir
- Pine
- Carolina Sapphire
Directions

Step one:
Grab a cedar branch and start by cutting off all the smaller branches. Have your floral foam and tray handy so you can decide how long you want to cut the cut branches. You want them long enough to flow over the edge of the tray giving that fountain look. Once you’ve decided on your approximate length, start cutting the branches down to size until all the cedar has been cut. Really small branches can be set aside for later.

Step two:
Take each piece of cedar and, using your fingers, start stripping the bottom of the branches just enough so that when you insert it into the floral foam it stays securely in place. Once done, gather bunches of 5-6 pieces of cedar and secure tightly at the stripped base with a small piece of wire wrapped around it a few times. Fan out the branches a bit and continue making bunches until all of the cedar has been used, except for the pieces you set aside.

Step three:
Now you’ll need your painted snowberry branches. You’ll be making similar bundles to the cedar branches. Cut off the smaller ends and create the bunches to your desired size. You don’t need to do a specific number of branches in your bundle, just enough so that you’re satisfied with how it looks. Like the cedar bunches, you’ll be using a small piece of wire to attach it securely at the base.

Step four:
Begin cutting the rest of your greenery following the guide below:
Ilex: cut all of the small branches off, and strip the bases.
Eucalyptus seed pods: cut off ends of the branches until they’re a bit shorter than the cedar bunches
Baby blue Eucalyptus: Cut your eucalyptus in half to ensure it’s long enough to be visible in your centerpiece. Strip the bottoms.
Fir: Take your fir pieces, hold down half of the needles and cut in half creating two fronds.
Pine: Depending on the sizes of the pine branches, you can cut down to your desired size if they’re too big. Strip the bottoms.
Carolina Sapphire: Depending on the length cut into 2 or 3 pieces. You want the pieces a bit shorter than your cedar. Strip the bottoms if necessary.

Step five:
Now you need to prepare your floral foam. Take your large pot or bucket and fill with enough water to cover your foam. Now place it on top of the water. Don’t push the foam down, let it sink to the bottom by itself. Once it’s sunk to the bottom, remove, shake out excess water, and place in your dish. The floral foam will ensure your centerpiece stays fresh as long as possible. If it eventually dries out before the holidays are over, you can add more water to the tray.

Step six:
Take your candles and insert them into your floral foam. Since the candles are so thick you’ll need to take your time and work them into the foam. Don’t worry if they’re a bit crooked at this point. You can straighten everything out at the end.

Step seven:
You’re now ready to start assembling your centerpiece. Take your prepared floral foam in it’s dish and start inserting your cedar bunches, applying around as close to the dish as possible, trying to insert them at an upward angle with small gaps between each bunch. Stagger the bunches as you make another row above and continue until you’ve used all of your bunches. Next take your pine branches and start adding pieces throughout the cedar bunches. Make sure to add some on top, you want to try and cover a lot of the bigger gaps with the cedar and pine. You can use some of the cedar that you set aside to fill in more on top and around the candles.

Step eight:
On this step we’re going to add the rest of our greenery. Now that the centerpiece has started to take shape, start by adding the Eucalyptus, Carolina Sapphire, Fir, Painted Snowberry Branch bunches and Eucalyptus Seed Pods, making sure to try and fill any gaps left, but also trying to make it all visible throughout. Don’t be afraid to move pieces around to your liking. Now it’s time to start adding your Ilex. The branches may be a bit short, so you want to try and place in spots where you can notice the red of the berries. And last but not least, add your pinecones. Place them wherever you think looks best!
Step nine:
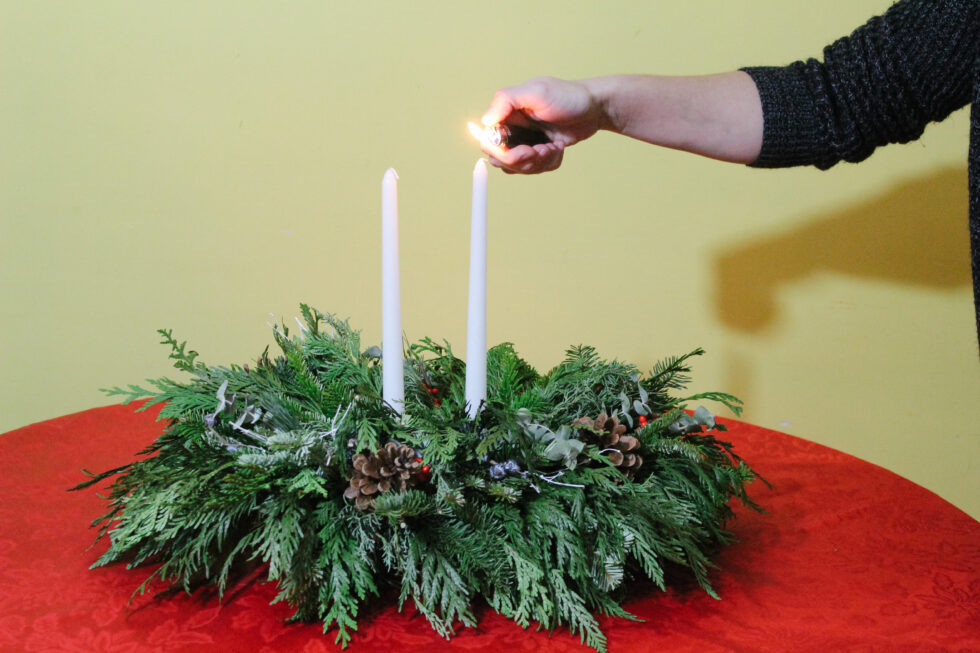
Take your clippers and trim around your centerpiece as necessary. If you’re happy with everything’s placement and you’ve trimmed all the branches to your liking, your centerpiece is complete! Now, time to light the candles and appreciate the beautiful centerpiece you’ve just created!
If you’re more a visual learner, we have a You Tube video prepared to easily show you how to make the centerpiece!
I hope this tutorial was fun for you and that you learned something! If you have any questions, please reach out and ask!
xoxo
Sarah


